
Hi and welcome to another summer stitch school adventure. This week I’ve selected needle weaving. It’s a little different from the others because it’s more like a technique than a single stitch, but the stitches are just variations on the idea of weaving the needle in and out of bars. Needle weaving is very nice for adding textures and interesting details to your projects, so it’s definitely worth a little time to learn it.
The needle weave stitch
The basic idea is the same for regular weaving on a loom. First, make a series of vertical straight stitches.


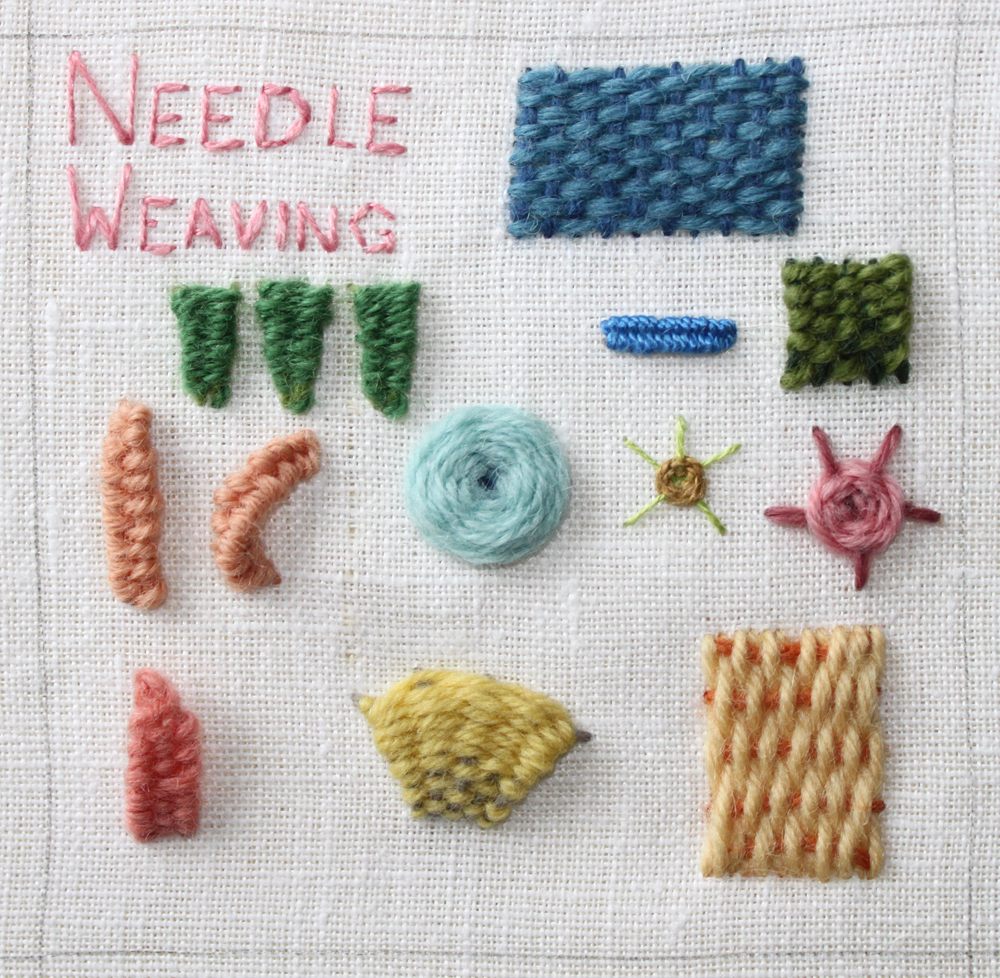
There many ways to use needle weaving to create different effects and types of stitches. The sampler shows a few of these.

1. This is the basic needle weaving stitch in a few different forms. As shown above you can end each row of weaving by bringing the needle to the back of the fabric or you can just wrap the thread around the last bar and start the next row. Note that the more firmly you pull on the thread while weaving, the more edges will bow inward.

Also note the difference that making the straight stitches farther apart makes. This is especially apparent in the irregular shape example.
2. This type of needle weaving is called needle woven bars. This stitch is formed by first making two straight stitches, and then weaving back and forth around them. The sampler shows both a variation with parallel straight stitches and one with nonparallel straight stitches.
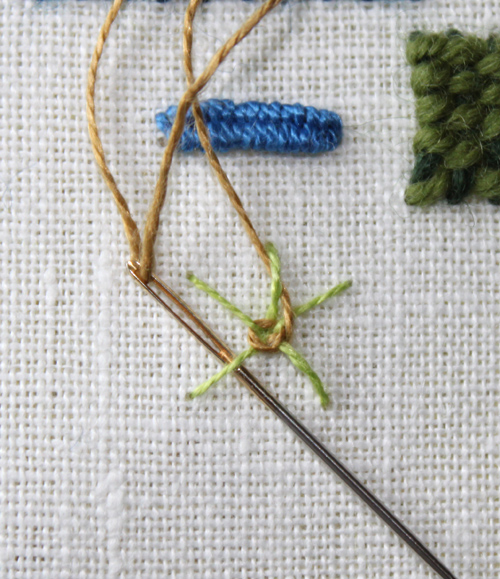
3. This variation is known as woven spiders wheel. To form this stitch, you make an odd number of straight stitches radiating out and weave in and out of them. You can fill the radiating bars completely or leave the spokes showing.
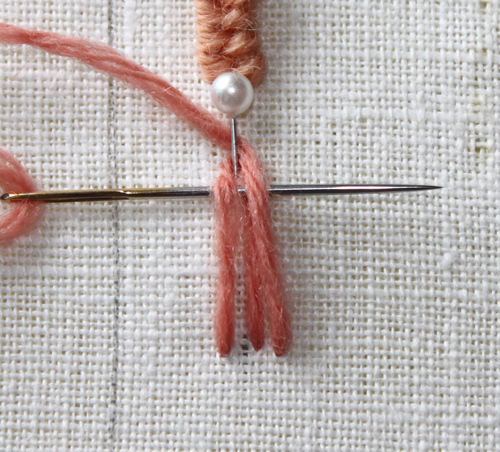
4. This type of needle weaving produces a raised effect. To form this stitch, bring the needle up and down just slightly over to the right of where the needle was brought up. Then with a scrap of thread pull the loop firmly.
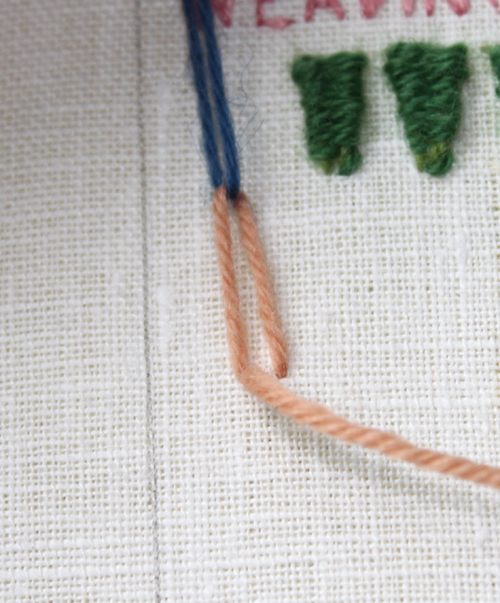
Bring the needle up again at the base of the loop and begin needle weaving. You will have to hold onto the scrap thread while you work up the loop. Gently push the weaving down a little as you go along. Be sure to pull firmly after each turn, but not so firmly that the weaving is pulled upwards.


That concludes another week of summer stitch school. I hope you enjoyed seeing this stitch.Grab a needle and give it a try. It really does help to play around a bit and try the stitches – plus it’s lots of fun!!
I cannot thank you enough….just wonderful with this weeks tutorial….and your WIP looks fabulous!