
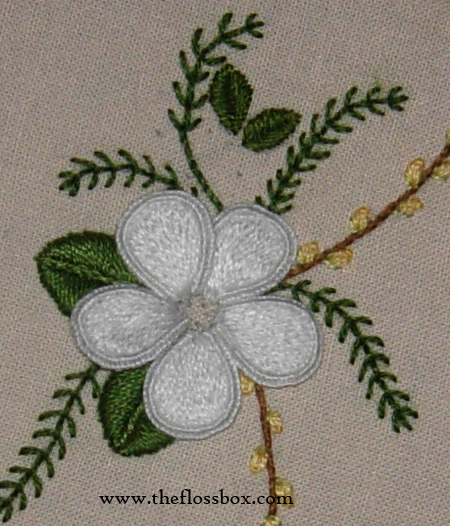
This stumpwork flower project is good for beginners and experienced
stumpwork embroiderers alike. You may, of course, stitch this design as
a regular surface embroidery project instead.
Materials
- background fabric
- white calico/woven cotton
- 30 gauge paper-covered wire – you can use uncovered wire, but it is harder to work with. (Cake decorating suppliers sell the paper-covered wire.) You’ll need 5 x 4.75″ lengths.
- DMC Floss colors: white, 498, 744, 869, 937, 3345, 3346, 3347, 3348
- 3 red Mill Hill pony beads
- 3 gold petite beads
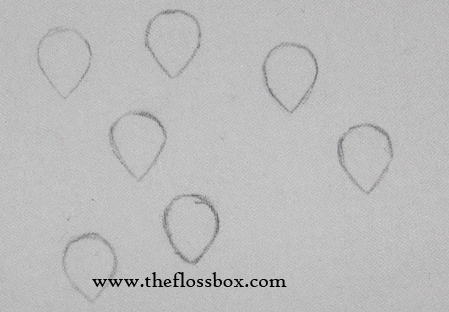
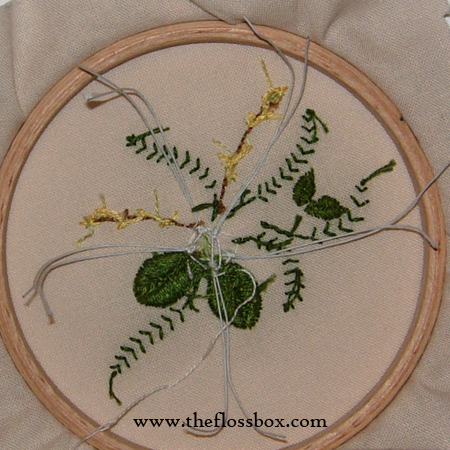
Step 1 Transfer the skeletal lines of the design to your fabric. Transfer the petal leaves onto the white fabric.
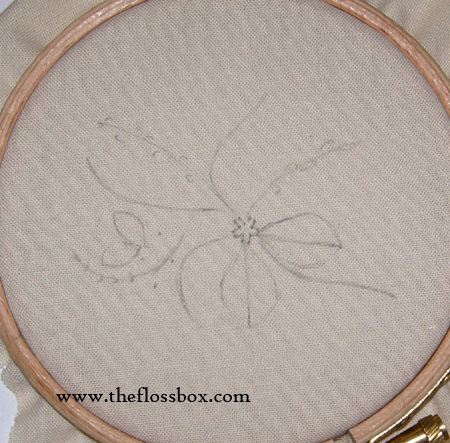
It never hurts to go ahead and draw a couple extra petals, “just in case”.
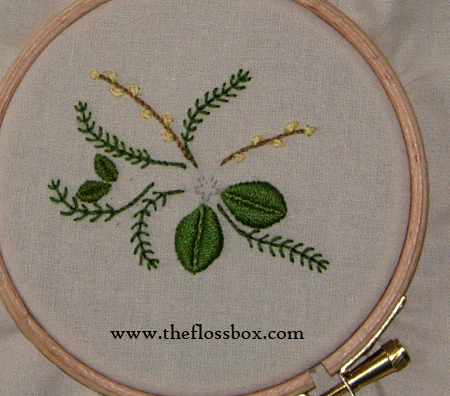
Step 2 Stitch the background as follows: Fronds – fly stitch 3345 – 2 strands Branches – 869 stem stitch – 2 strands Buds on branches detached chain – 744 – 2 strands, then single fly stitch around the bud – 3348 – 1 strand 2 Small leaves with fishbone stitch – 937 – 1 strand 2 Large Leaves padded satin stitch 3346 – 2 strands, then stem stitch center of each leaf – 3347 – 2 strands Middle vein of the leaves with stem stitch – 3348 – 1 strand
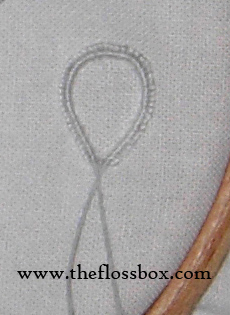
Step 3 Now for the petals. First step is to couch down the wires with one strand of white floss. Couch every 1/8 inch or so.
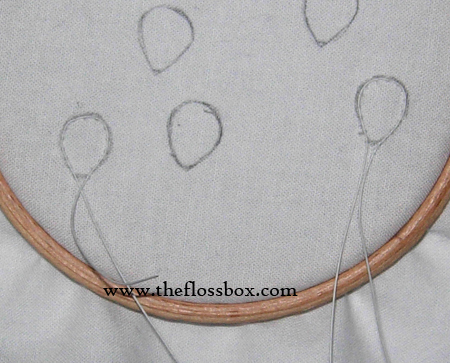
Then do a close buttonhole stitch around the wire with 1 strand of white floss. It takes a little practice to do this evenly, but it’s worth the effort.
The next step is to do a close long and short stitch button hole (1 strand white floss) across the upper curve of the petal.
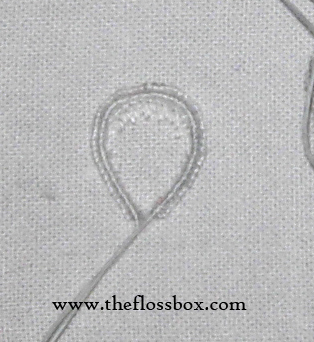
Then fill in the petal with long and short stitches. (1 strand white floss)
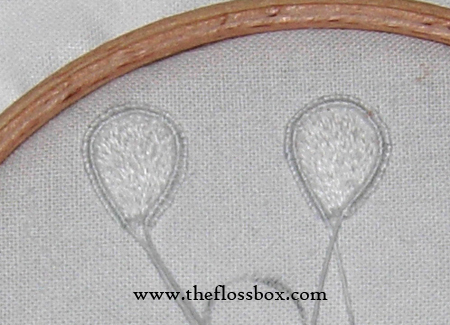
After all petals are completed cut them out.
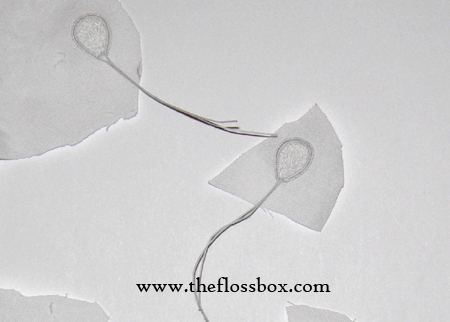
Use a pair of small sharp scissors to cut away the fabric just outside
the buttonhole stitches. Scissors with long sharp tips, such as stork
scissors work well. Be very careful not to cut your stitches.
Step 4
Insert the wires into the holes marked with small circles. One wire in each hole.
Bend the wires back on the backside and stitch them down.
Bend them around again, trim and stitch them down a few more stitches.
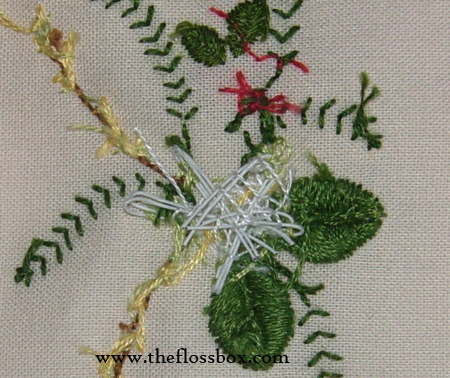
When the wires are in place, do an outer ring of french knots with 3348 –
2 strands in the center of the flower, then fill the inner area with
french knots using 744 – 2 strands. Also, you can gently bend the
petals back, so they have a curve backwards when they sit on the fabric.
It’s a really nice effect – helps emphasize the extra dimension.
Step 5
For the covered beads, begin with one long strand of red floss, I found
about 1 yard/meter was enough to cover the whole bead. Leave a tail on
the bottom of the bead of about 5 inches, proceed to wrap the bead with
the floss. Push the wraps close together. When you are finished
wrapping the bead, thread a small gold bead onto your thread and put the
needle through the bead so both ends are now hanging out the bottom and
the gold bead sits on top. Use these ends to attach the bead to the
fabric.

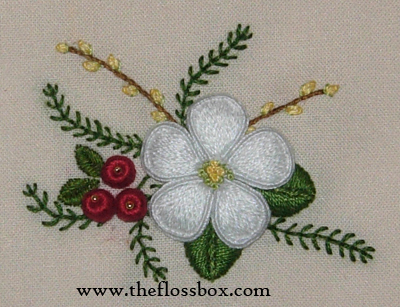
Finished!