Looking to personalize your clothes or accessories or perhaps create a little gift for a new baby or maybe an easy hobby to do while watching your favorite programs?
Consider embroidery as a way to add some color and art to your life.
Getting started with embroidery is very easy, and it doesn’t require expensive or specialized start-up materials.
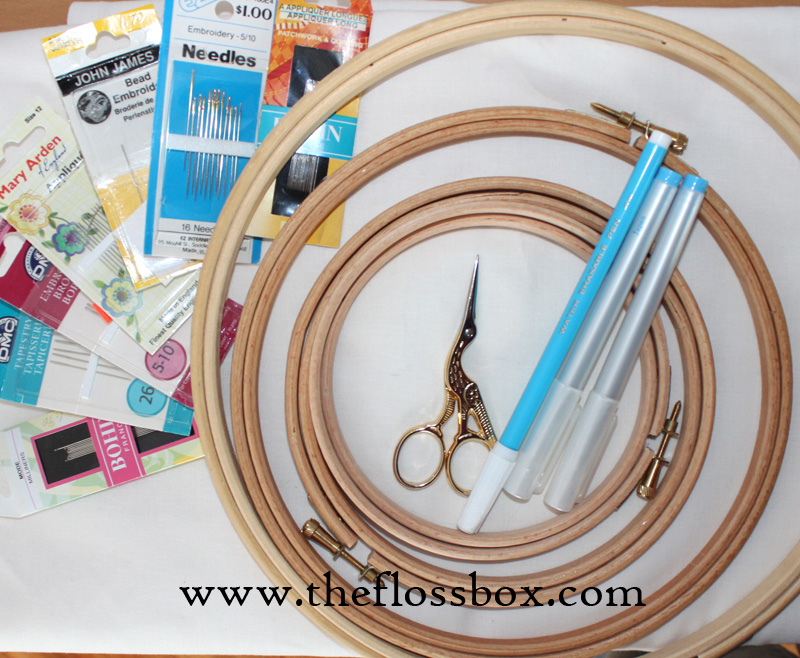
Necessary materials
- Floss and needles – Buy a pack of needles with various sizes so you can vary the amount of thread you use. Watch for floss sales, periodically you can find them 4/$1 or even less if you are lucky. Check garage sales and flea markets too!
- Fabric – a simple woven cotton is great to get started with.
- Embroidery hoop – It’s important to keep even tension across the fabric. A basic hoop is only a few dollars.
- Pattern – There are tons of free patterns out there for you to get started with! Purchased iron-on patterns are easy to use, but print-outs aren’t difficult to use either. With a water-soluble fabric pen or a fine-lead pencil you can use a light box to transfer a printed design to fabric. You can even draw your own design right on the fabric with the water soluble ink pen.
- Scissors – A small pair of sharp scissors work best. Avoid large scissors as you can’t get a nice close cut, and the risk of an accidental cut is too great.
Optional items
- Light box – a window or a glass table work well too.
- A book with stitches – There are many free online resources to check out too. It’s best to start out with simple stitches to get the feel of embroidery, then move on to more complicated stitches.
- Beads, buttons, ribbons and charms – Consider incorporating them into your work, they can add a lot of interest to your stitching.
- Stands and frames – Stands can make stitching easier physically by holding the hoop for you. In addition to hoops there are different types of wooden and plastic frames for holding your projects in. These can get pricey, so do your research first to see what might best match your needs.
- Specialty fibers – there are no shortage of lovely flosses and threads to work with in all sorts of material types: metallics, yarns, silks, wools, blends. You can purchase dyed threads to create subtle shading effects, or try your own dying, it’s fun!
Getting started.
- Prepare your threads. It’s a good idea to either use bobbins or little sealable baggies to hold the thread. The floss can quickly become a tangle of knots if you aren’t careful. Regular cotton embroidery floss can be separated into strands. Consider how thick you want your stitches to be when deciding how many strands to use. Use a variety of thicknesses to create more interest. Don’t be afraid to experiment a little!
- Prepare your fabric. If you plan to embroider something that will need washing, it’s a good idea to wash the fabric first. Consider what you want to do with your completed needlework when planning how much fabric to use. For standard framing at least 2 inches is a good starting place. Center your design in your hoop. Many stitchers use hoops that can hold the whole design because stitches that get caught between the hoop rings sometimes get pulled and messed up. So be careful with hoops smaller than your design.
- Pattern Transfer. If you are using an iron-on, follow the instructions provided. If you are using a light box, tape down the pattern, then tape the fabric over it and trace the lines with your pen or a pencil. Doing a careful job transferring the patterns will give a nicer result, but remember this is hand-work, don’t expect the same results as a machine!
Test samples
It’s always a good idea to do a little test on a small scrap of your fabric especially big designs, or when using expensive fabrics. Test a few stitches, make sure you have the number of strands for the effect you are after. Also be sure to test that the pattern you transferred will wash out or be completely covered by your stitches.
Starting stitches
The following are the names of some basic stitches to get started with. Check the online dictionaries or a book for them.
Back stitch
Chain stitch
Stem stitch
French knot
Running Stitch
Lazy Daisy or Detached Chain
Satin Stitch
You can do a lot with just these basic stitches! Use your imagination to make your project interesting.
What’s next?
Whatever you can imagine, you can stitch.
With either purchased or free patterns or your own designs, there are many things that will make your work interesting and personal.
You can stitch on anything you can think of, clothes, bags, jewelry, ornaments and decorations, quilts and wall hangings, or create an ongoing project and stitch whatever comes to mind.
Explore different types of stitching: crewel work, hardanger, silk ribbon embroidery, cross stitch, raised embroidery, or combine it with a different craft. Remember that embroidery is an art form and there really are no rules other than to have fun!