Welcome to another Summer stitch school lesson!
This week’s lesson is pekinese stitch. It’s a very uncommon stitch, which is a shame because it’s quite decorative.
Pekinese is a line stitch which can be also made as a filling when lined up in rows. It’s made in two stages.
Pekineses Stitch instructions
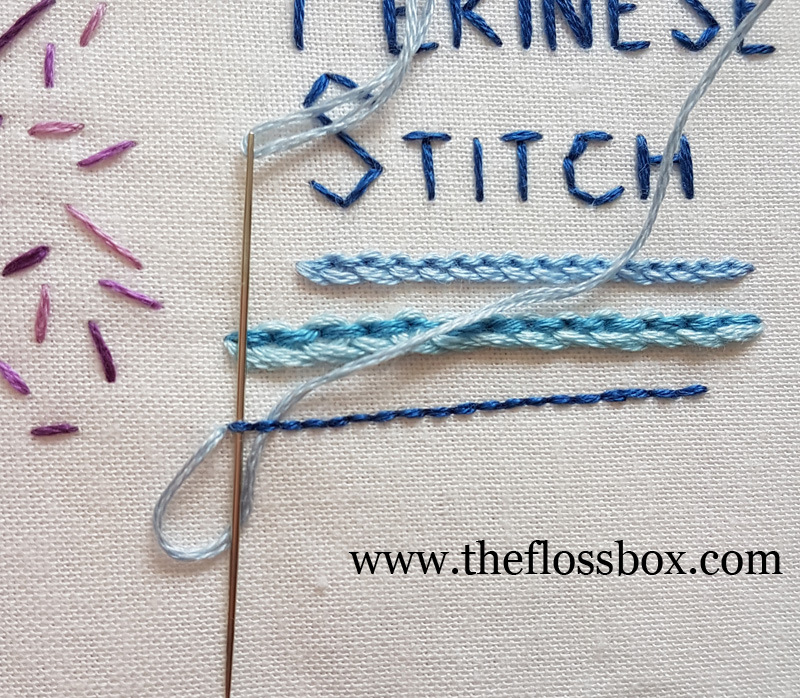
First make a line of back stitching. The stitches shouldn’t be too small since we will be passing the needle through them.
Now bring up the thread again at the start of the line of stitching. Send the needle under the second back stitch.
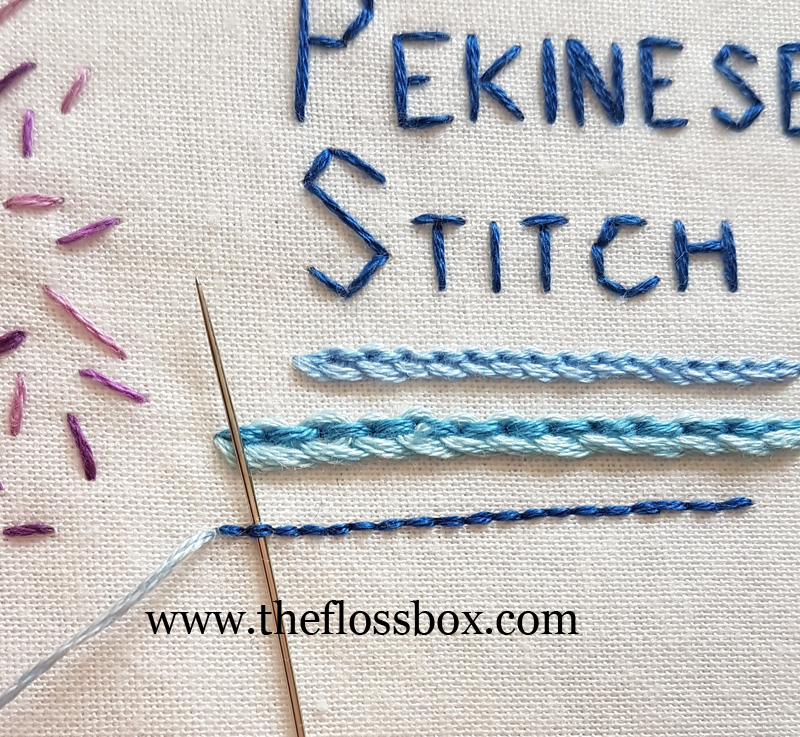
Then send it under the first stitch, making sure the thread is looped under your needle. Pull through, but not too firmly.
Make another loop like this by passing the needle under the third stitch. Make a loop by passing the needle down under the previous stitch.
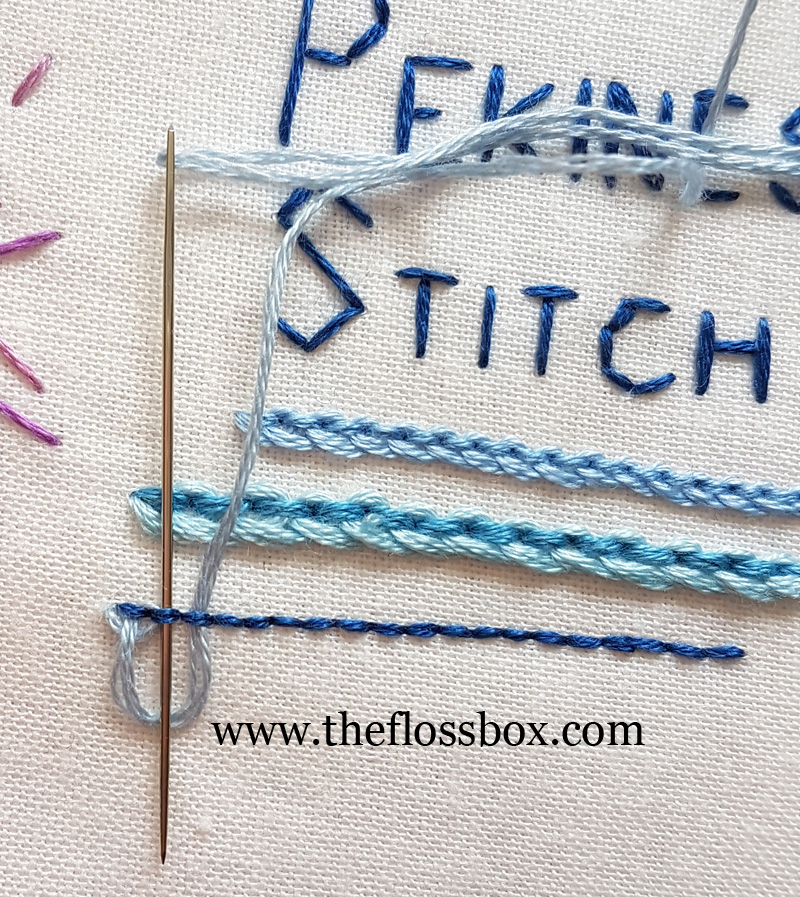
Continue through the line of back stitch.
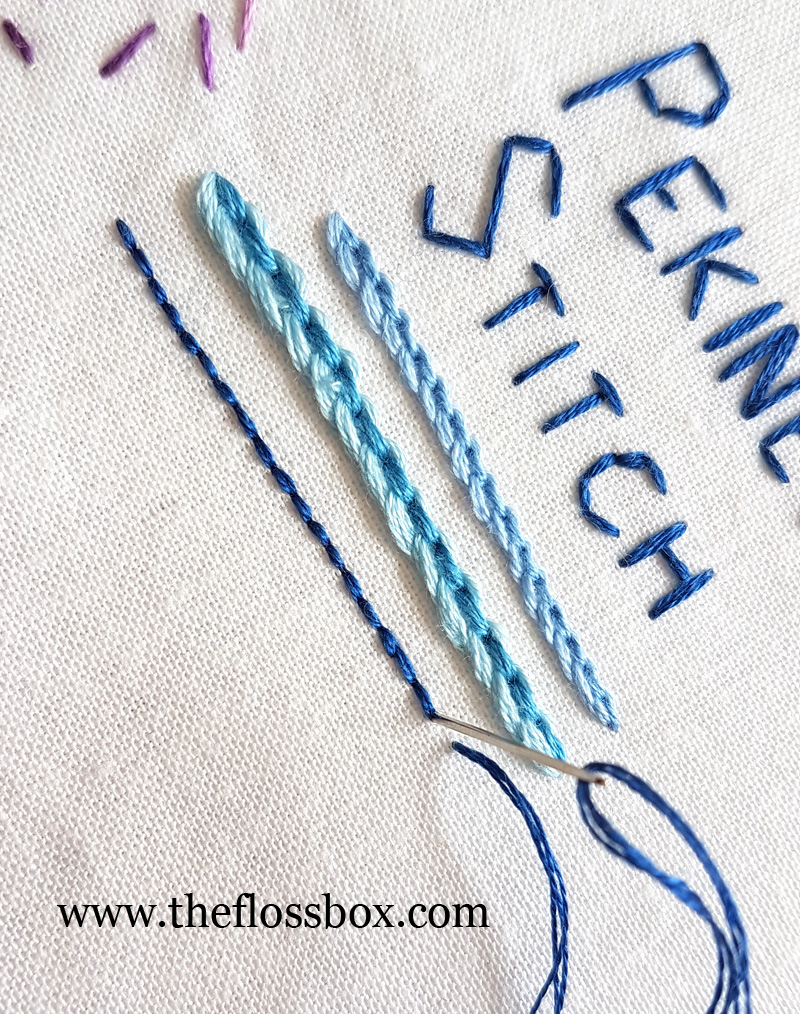
I have used a contrasting thread in my stitches, so it’s easier to see how to form the stitch, but you can also use the same color if you wish.
I have made three rows of pekinese stitches in my sampler. The first and third use 3 strands of embroidery floss. The top row has longer stitches in the back stitches. They could have been even longer for greater effect.
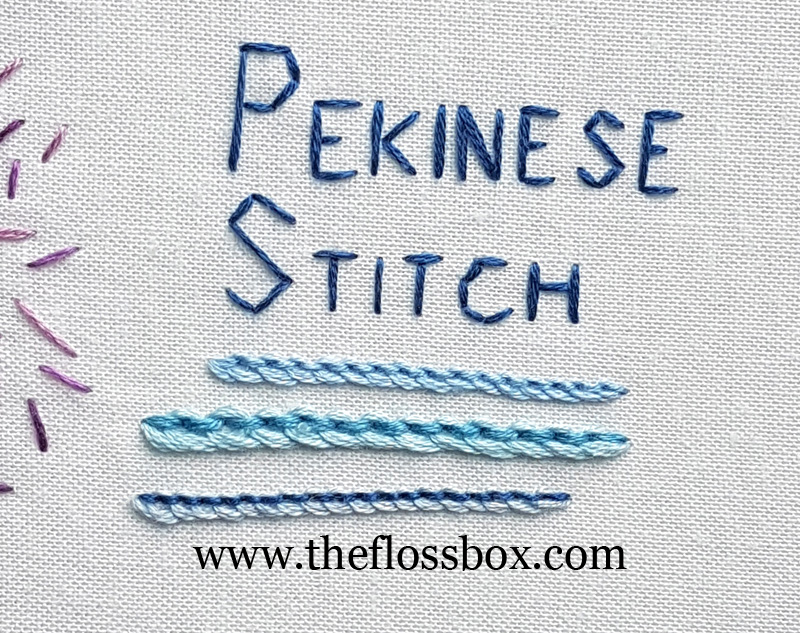
The second uses 6 strands. It creates much more texture and dimension. It would make a very interesting border or maybe a fill-in for a rooftop.
I don’t have any examples of this stitch in use since I’ve never used it in a project! This stitch is new for me.
Can you think of a way to use this stitch in a project?
I hope you have enjoyed this lesson. Another lesson next week.