
This week’s stitch is the colonial knot. I have been stitching for awhile now, but I have never actually tried this stitch. Time to change that. This stitch is a medium difficulty stitch. It just takes a few tries to get the movement down, but then it’s quite fun and not at all hard. Essentially this stitch can be thought of as two loops around the needle to make a figure 8, but don’t think of it as a figure 8 if that confuses you. This stitch will need of your both hands. One to hold the needle and make sure the thread doesn’t slip off, and the other hand to wrap the thread around the needle. I left mine out of the photos, but it just doesn’t work without them both. First thing after bringing up the needle is to make the first loop. You can do so by wrapping the thread around the needle like so:

Next is to form the second loop. Wrap the thread around your needle again, this time bringing it over the first loop and around to the other side.
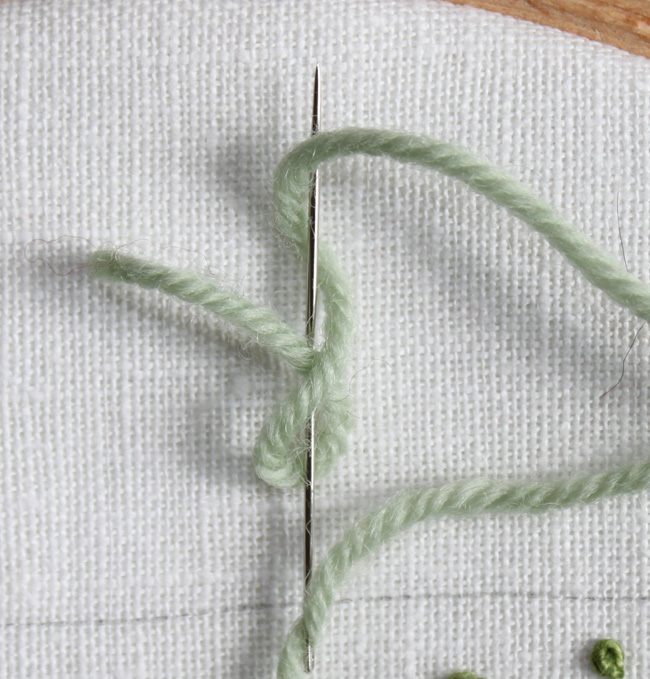
Now hold the thread with one hand while you push the needle down close to where you brought it up. If you let the thread slack just a little you will end up with a slightly looser knot with more thread on the top.

Now you are done! Not so hard.
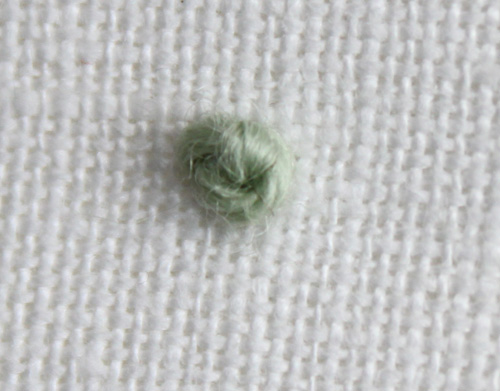
I made a small sampler with colonial knots and french knots in order to compare the two. I think you can tell that the colonial knots end up slightly bigger as they have a bit more thread sitting on top the fabric.

You can vary the threads as I have done, depending on the effect you are after. You can mix two colors for a more interesting coloring – I did this on the bottom two samples with a light and dark green.
When I first learnt this stitch, it actually took me two videos to figure it out. It turns out to be a very simple and beautiful stitch. Your photos show it very well!
Very nice! I've still yet to really master any knots . . . it's on my to-do list for my next piece though, so I better get on practicing. Thanks for the instructions on this, I was shortly going to be looking those up.
Thank you for the instructions- I am going to give this a go!